One Microphone
One well-positioned microphone can capture the complete drum kit naturally. This is useful for demos, lo-fi sounds and first recording experiments.

An acoustic drum kit is one of the most exciting instruments to record: kick, snare, toms, cymbals and the room all have to work together at the same time. You can begin with a single microphone or record every drum on its own track. This guide explains which microphones, inputs, cables and positions you need.
More microphones provide more control, but they also require more inputs, cables and attention to phase relationships. A clear and manageable setup is often more useful than using as much equipment as possible.
One well-positioned microphone can capture the complete drum kit naturally. This is useful for demos, lo-fi sounds and first recording experiments.
One overhead plus a kick microphone or a stereo overhead pair already provides considerably more control and spatial information.
Kick, snare and two overheads form a proven starting point. The important close signals remain independently adjustable while the complete kit still sounds coherent.
Kick, snare, several toms, hi-hat and stereo overheads can be processed separately. This requires a corresponding number of microphone preamps.
Microphones record the sound that already exists. Good drum recording therefore begins with tuning, drumheads, damping, cymbal balance and the room. A rattling snare or uncontrolled tom does not automatically improve when a more expensive microphone is used.
The classic recording path is:
Microphone → XLR Cable → Microphone Preamp in the Audio Interface → USB → Computer → DAW Track
The important figure is not the total number of connectors on the interface, but how many microphone inputs with preamps can be used simultaneously.
Eight drum microphones require eight suitable microphone inputs or an appropriate digital expansion.
A few centimetres can make a major difference when recording drums. It is therefore worth optimising microphone placement before reaching for EQ or plugins.
A microphone placed further inside the shell and pointed more towards the beater usually emphasises attack and definition.
Moving it further towards the resonant head or outside the drum often produces a rounder and deeper sound.
Small position changes can be more effective than extreme EQ settings.
A dynamic microphone is often placed a few centimetres above the batter head and angled towards the centre.
Aiming further towards the centre increases attack, while a flatter position can capture more body and rim character.
Dynamic drum microphones and rim clips save space around the kit.
Position cymbals as far outside the microphone's main pickup direction as practical and make sure the drummer cannot strike the microphone accidentally with a stick.
Good overheads capture the relationship between cymbals, snare, toms and the room.
Small-diaphragm condenser microphones are often used for this task because they can capture fast transients cleanly and are compact enough for flexible positioning.
With two overheads, symmetry in relation to the snare is particularly important. Measure the distance from the centre of the snare to both microphone capsules and make the distances as similar as practical. This helps central snare transients reach both tracks at more similar times.
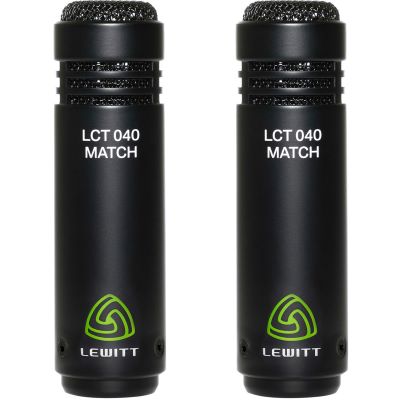
Two directional microphones are positioned with their capsules very close together and angled away from each other.
This produces a stable stereo image with good mono compatibility.
Two separated microphones create a wide panorama. Their distances to the snare and kick should be checked carefully because timing differences become more significant.
One microphone is positioned above the snare, while the second is located behind or above the drummer's shoulder.
Both microphones are positioned at equal distances from central reference points of the kit.
First plan the maximum number of microphones that need to be recorded simultaneously.
A two-channel interface is enough for stereo overheads, four microphone preamps suit a reduced setup and eight preamps are a typical foundation for complete multitrack drum recordings.
| Recording Setup | Microphones | Required Mic Preamps | Suitable For |
|---|---|---|---|
| Mono | 1 | 1 | Demos, vintage sounds, room recording |
| Stereo | 2 | 2 | Overheads, rehearsal-room recording |
| Minimal Multitrack | 4 | 4 | Kick, snare and 2 overheads |
| Complete Kit | 8 | 8 | Kick, snare, toms and overheads |
| Large Studio Setup | 10+ | 8 plus ADAT / preamp expansion | Room mics, snare bottom, second kick microphone |
The same sound event reaches different microphones at different times. When these signals are mixed together, some frequencies can partially reinforce or cancel each other.
A drum may become thinner when a second microphone is added to the mix. Kick and snare can lose low-end weight or impact.
If muting one of the tracks suddenly makes the sound stronger, checking microphone positions is worthwhile.
Check drumheads, damping, snare wires and hardware before positioning microphones.
First build a convincing overall sound of the complete drum kit.
Position the two most important close signals to achieve the desired balance of attack and body.
Add tom and additional microphones only where they provide genuinely useful extra control.
Let the drummer play as loudly as during the real take. Set the gain so hard hits still leave enough headroom and do not clip the input.
Record a short groove including fills instead of listening endlessly to individual soloed microphones.
Evaluate balance, bleed and phase relationships with the complete microphone setup active.
A mono check can reveal cancellations that are less obvious in a wide stereo image.
The selection is grouped into complete microphone sets, individual kick/snare/tom microphones, stereo overhead solutions, audio interfaces and an alternative electronic recording route.










Eight poorly positioned microphones are harder to mix than four well-positioned ones. Build the basic drum picture first and add microphones only where needed.
This can make the drum kit sound disconnected. Begin by treating the overheads as the main overall image of the instrument.
Drums generate very fast signal peaks. Sufficient headroom prevents clipping when an individual stroke is played harder than during the sound check.
Many condenser overhead microphones require 48 V. Without the correct power supply they may provide no signal or fail to operate correctly.
Wide stereo overheads may sound impressive on their own while still creating frequency cancellation when combined with close microphones.
Microphones capture reflections that may be less obvious while you are actually playing. Simply changing the position of the drum kit can make a major difference.
A convincing drum recording is not created by using as many microphones as possible. It begins with a good instrument sound, appropriate microphone positions and a clear signal path. Kick and snare provide important close signals, while the overheads capture the drum kit as one complete instrument.
Additional tom, hi-hat or room microphones can then provide extra control where needed. On the technical side, plan enough microphone preamps, XLR connections and phantom-power capability.
Set recording levels using the drummer's real playing volume and regularly listen to several microphones together and in mono. This helps identify problems during the recording session and produces tracks that are considerably easier to mix afterwards.
Musikhaus Korn can help you combine drum microphones, stands, cables, audio interfaces and recording equipment into a suitable complete setup.
Start with the number of microphones you actually want to record simultaneously. That determines how many preamps, stands and XLR connections are really required.
From drums and microphones to home-studio equipment and complete event technology, further Musikhaus Korn guides provide practical help for planning a suitable setup.